Read receipts are a great way of tracking the status of your email. The option was introduced by Microsoft in Outlook in order to help users track whether their email has been received and read successfully by the correct recipient or not.
Read receipts are just like delivery reports with which we are all so familiar. The only difference is delivery reports reported whether the email has reached the target recipient’s mailbox or not while read receipts report whether the message has been read or not by the recipient.
Outlook versions are well equipped with the facility; both previous and the latest ones. This post will show how to add read-receipt request for specific address in Outlook 2013. Following is a walkthrough the procedure of the enabling read receipts in Outlook for the tracking of email messages.
Adding Read Receipts for a Particular User on Outlook 2013
Receiving read receipts from everyone that you contact through email can be a little messed up for you as well as your inbox. Therefore, Outlook comes with the provision of selecting who you want to receive a read receipt from instead of all the contacts.
Following are the few steps that will introduce you to custom tracking of emails:
- Open a new message window and type your message and add the desired recipient.
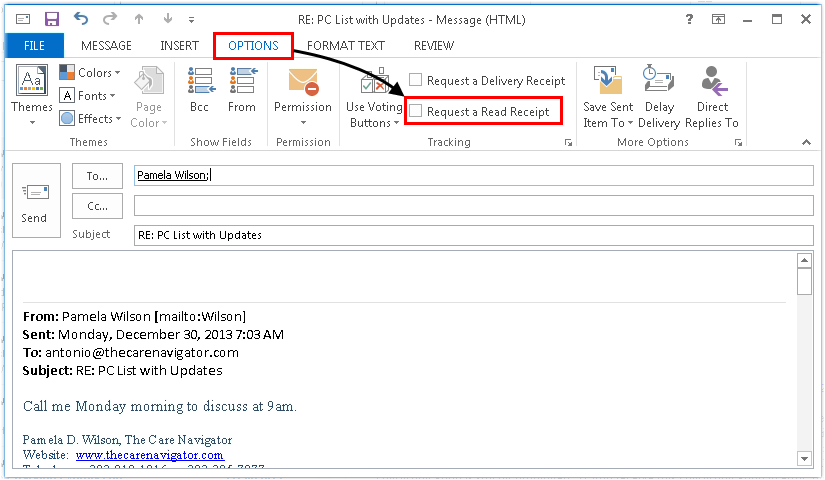
- Click on Options tab
- Within the Option tab area, you will see a checkbox that reads: Request a Read Receipt.
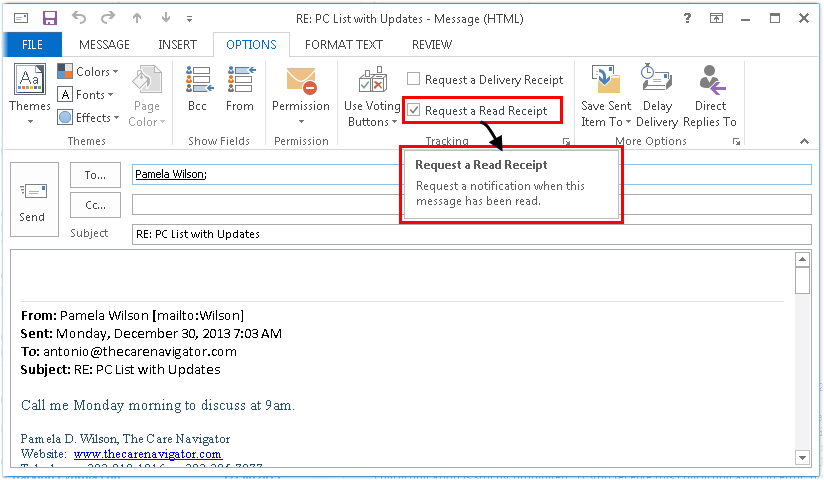
- On checking the checkbox, you enable receiving a receipt from the specific contact reporting whether they have read your email or not
- Check on the box to enable receiving a Read Receipt from the recipient.
- Click on Send once the message is prepared.
Adding Read Receipts For All Contacts in Outlook 2013
In order to implement the read receipt option on your email account for any / all emails that are sent out, follow the steps given below:
- Open Outlook.
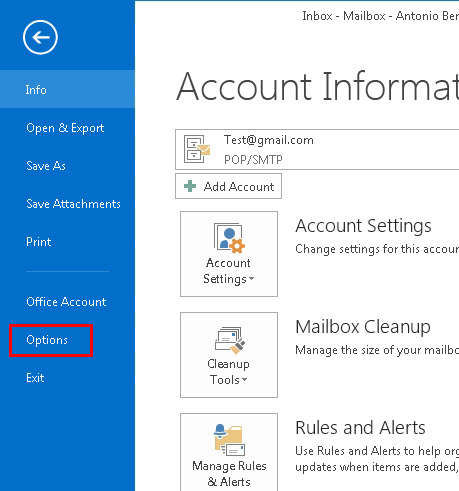
- Go to the File Menu from the menu bar given on top of the window.
- Click on Options from the number of options given on the left pane.
- A window namely, Outlook Options will appear on your screen.
- Click on Mail tab.
- Now keep scrolling till you find a section named ‘Tracking’.
- In the Tracking section, tick on the checkbox that reads: ‘Read receipt confirming the recipient viewed the message’.
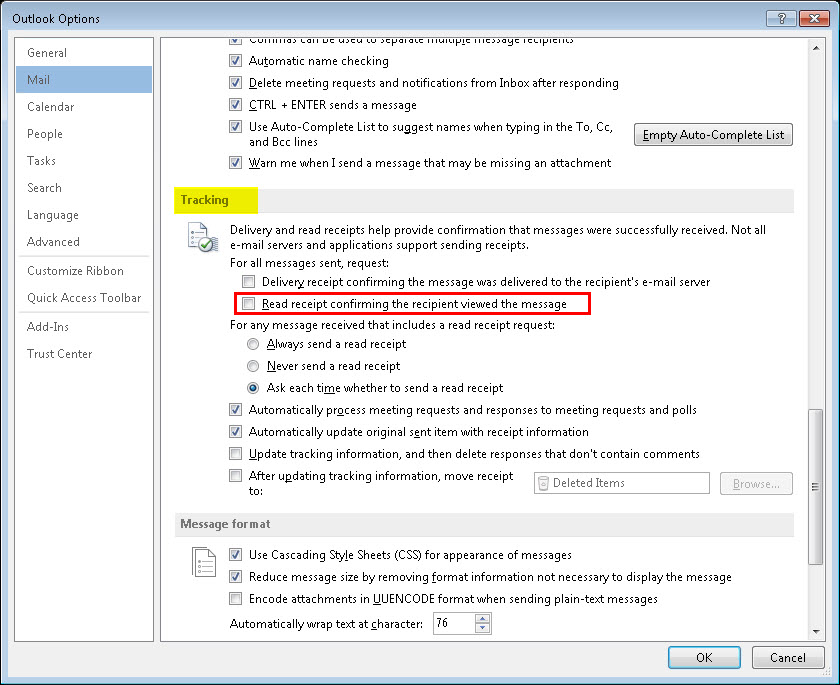
Note: You can also choose to send a read receipt to the contact(s) who have requested one for the message they have sent to you. This can be done by selecting the checkbox that reads; ‘For any message received that includes a read receipt request’.
Conclusion
This is how you can enable tracking messages that are sent out from your Outlook account. However, respective measures need to be taken in order to fulfill different needs therefore, both ways of receiving read receipt have been defined in the post above.

