Undoubtedly, webmail clients are portable and simple to use, and most of them are free to use! In concern with the security and space factor, web mails have proved themselves to be an important part of messaging services in the past decade. However, these messaging platforms are like two ends of a coin, i.e. while they have advantages, they have disadvantages too. For example: There is a risk of security breaches, Server outages, or inaccessibility without internet connectivity.
Taking all these factors into consideration, users are preferably shifting to desktop email clients. The benefit of having a mail client on a machine, its database is backed up locally and accessed at any time, even without net connectivity. Yes! Although the send/receive process is restricted without the internet, there is a facility to access emails and other data in the absence of network connectivity.
Microsoft Outlook & its Popularity in Mail Clients World!
Several software communities are coming forward with reliable desktop email clients (Microsoft, Mozilla, and Apple to name a few). Amongst the various options that were made available, Microsoft Outlook managed to stand apart because of its cost, simplicity, and of course efficiency.
MS Outlook is an email client that is installed on the Windows Operating System and comes integrated into the MS Office suite package. The database of this application gets saved into a Personal Storage Folders (PST) file. Over time, a lot of improvements in this application have been made and that is delivered through its different versions.
Along with its incredible features, what makes Outlook a choice for both home and business users is its integration with IMAP, POP3, and MAPI accounts. The powerful integration of Outlook with Exchange Server and Active Directory makes it a choice for various enterprises.
What is a Profile in MS Outlook?
When MS Outlook as a messaging platform is used, definitely there would be an email account with which it is integrated, a data file where emails, contacts, or related items will be saved, and information about all these items will be stored. All this configuration information gets saved in a “Profile”. By default, a profile named “Outlook” gets created and it gets updated when an email account is added. The profile details get saved into the Windows registry and have the following components:
- Details about Account in Use: Here, information about the username, the name in the display, the Mail Server name, and the ISP password are stored.
- Where is Messaging Data Saved: There are two locations where Outlook data is saved: in the mail Server or in the local database file saved with the .pst extension. If Outlook is integrated with Exchange Server, the data gets saved into an offline storage folder (.ost) file.
An Outlook profile can have one or more mail accounts and data files. If an individual is using Outlook, he may prefer a POP3 or IMAP email account while at a corporate level, MAPI protocol is preferred which is Outlook configuration with Exchange Server.
How to Set Up Outlook with IMAP/POP3 Account
Since the previous versions of Outlook are less in use, here we are going to discuss how to set up Outlook 2007, 2010, and 2013 with IMAP/POP3 profiles. Here, the configuration is exemplified using a Gmail account.
Step 1) Login to your Gmail account. Click on the gear button at the top-right of the screen and drop down to “Settings”. 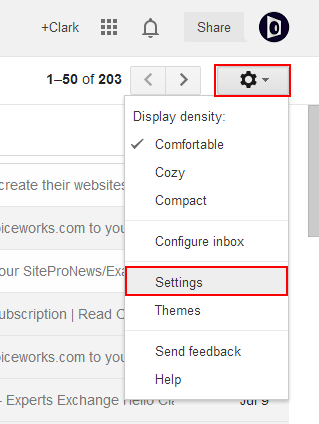
Step 2) Under the “Forwarding and POP/IMAP” tab, navigate to the “IMAP Access” section and select “Enable IMAP”. Move down on the screen, and click “Save Settings”. 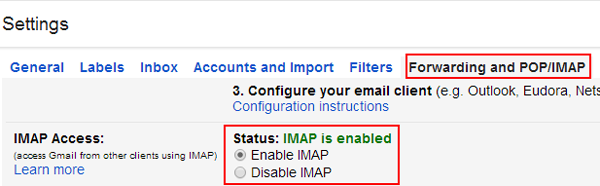
Step 3) Go to “Control Panel” and click on “Mail”. A mail setup wizard will pop up on the screen; click “Email Accounts…” 
Step 4) Under the “Email” tab, click on the “New” button. 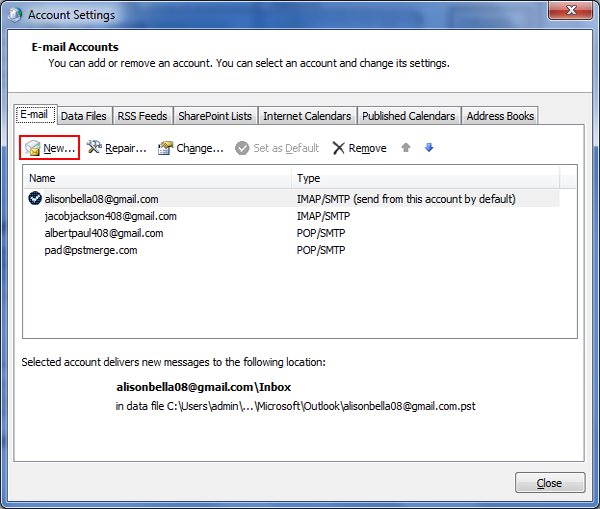
Step 5) Define with which type of ISP Server you want to avail. 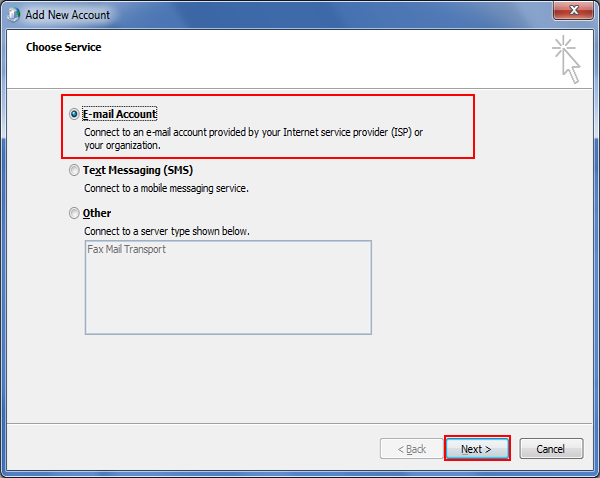
Step 6) In the window that pops up, provide credentials to set up Outlook. Click “Next”. 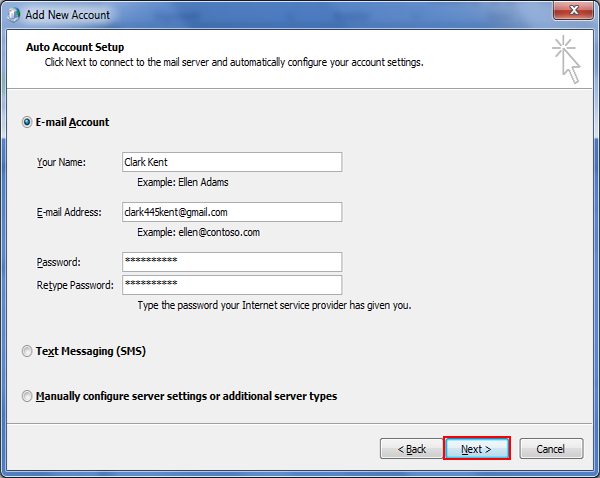
Step7) Outlook will start establishing a connection with the Server. 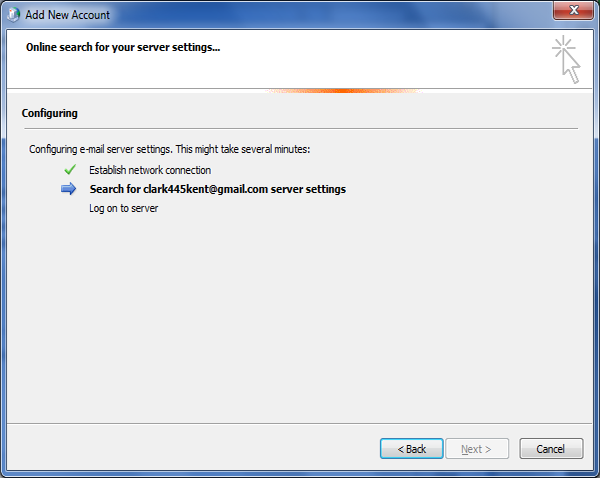
In most cases, the auto-configuration process fails and you may receive errors like that mentioned below. To work around this, click on “Manually Configure Server Settings”. 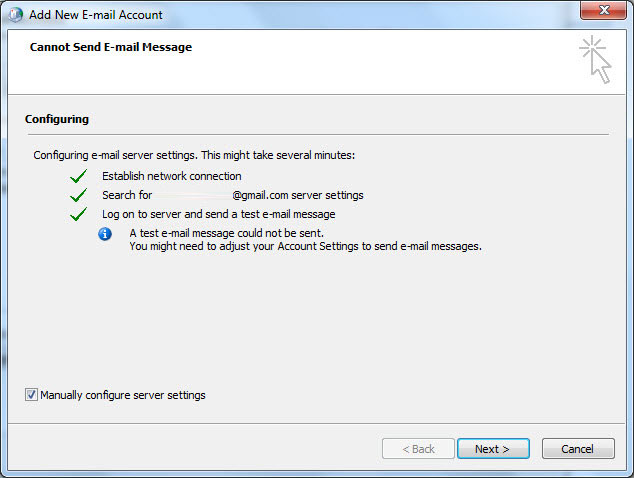
Step 8) On this window, special attention has to be paid to “Server Information”.
Account Type:
- IMAP
- Incoming Mail Server: imap.gmail.com
- Outgoing Mail Server: smtp.gmail.com
After filling in the required fields, click on the “More Settings” button. 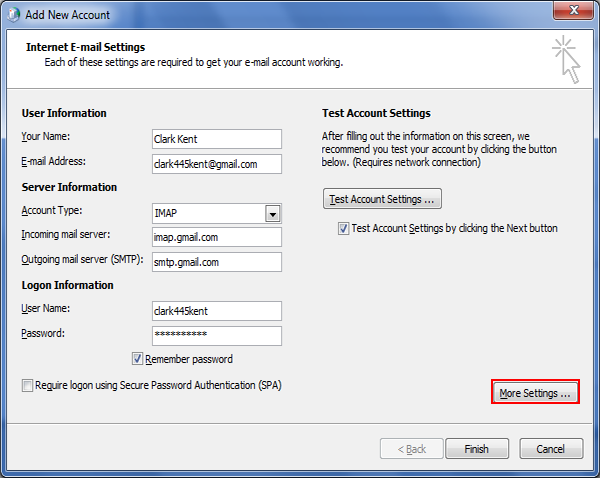
Note: If the Outlook profile has to be configured with a POP3 account, then:
- Account Type: POP
- Incoming Mail Server: pop.gmail.com
Click on the “Advanced” tab. Here, set the default port for incoming and outgoing Server At the bottom of the screen, you can notice an option: “Leave a Copy of Message on the Server” This is an elective facility. 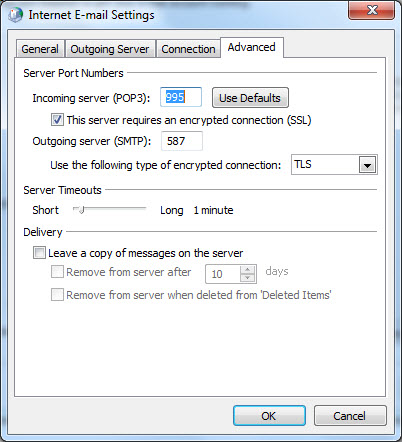
- Incoming Server: 995
- Outgoing Server: 587
Note: For outgoing Servers, select the encryption connection type first and then define the port number. If vice versa is done, then the port number will be reverted 25/587
When all fields are filled, click “finish“. 
How to Configure Outlook with Exchange Server
Follow the steps in the above-mentioned procedure and then the guidelines shared below:
Step 1) On the Add Account wizard, click on “Manually Configure Server Settings or Additional Server Types“. 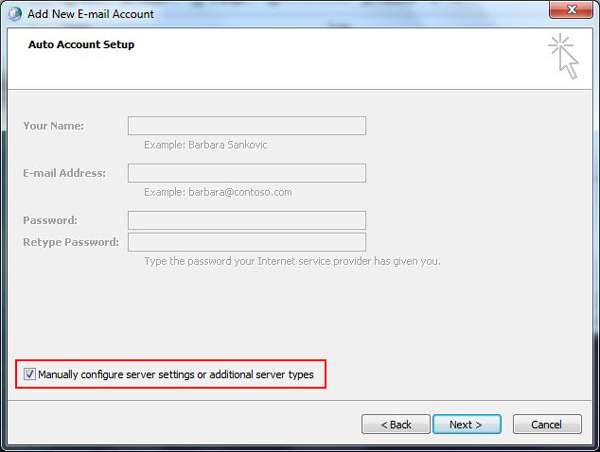
Step 2) On this page, define the Server type. Select “Microsoft Exchange or Compatible Services“. 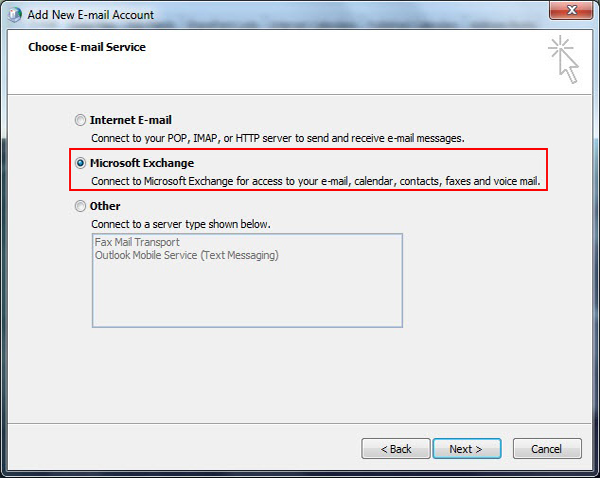
Step3)
- In the text box for Server, enter “Outlook“
- Enable the “Cached Exchange Mode” to create an OST file
- In the Username textbox, enter the complete “Email Address”
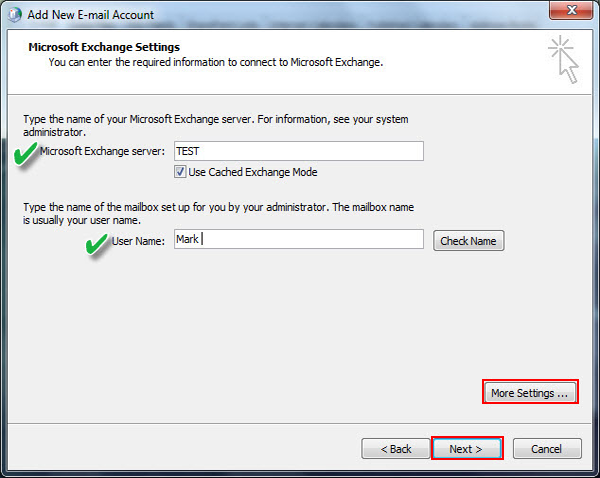
After entering the asked credentials, click on the “More Settings” button.
Step 4) Click on the “Connection” tab and enable the check box for “Connect to Microsoft Exchange using HTTP” under the Outlook Anywhere section. After this, click on “Exchange Proxy Settings“. 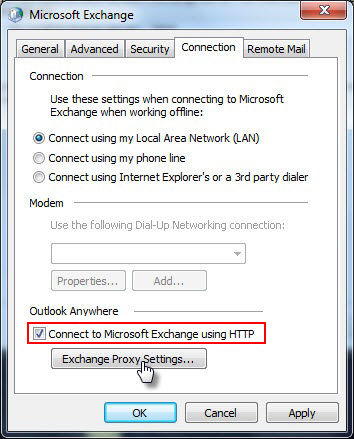
Step 5) Follow the guidelines mentioned in the image fill up two sections highlighted in it and click OK. 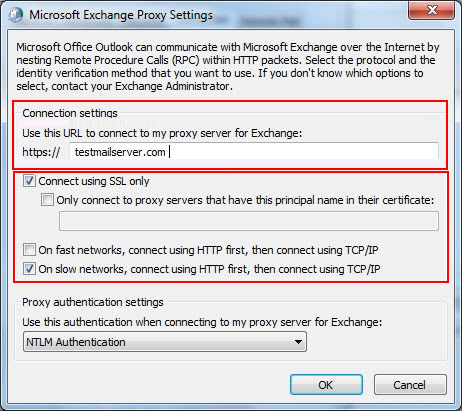
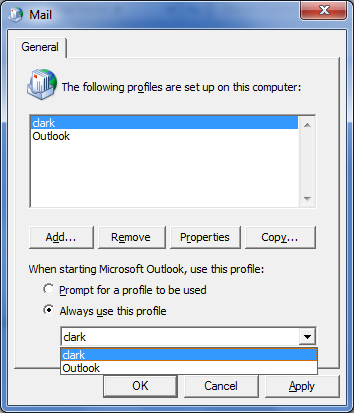
How to Set Default Email Account Outlook?
If Outlook has multiple accounts configured, then while sending an email, a user might have to manually select the account through which sending has to take place. This problem can be simplified if a default account for sending emails is being set up. For this, the following steps can be followed:
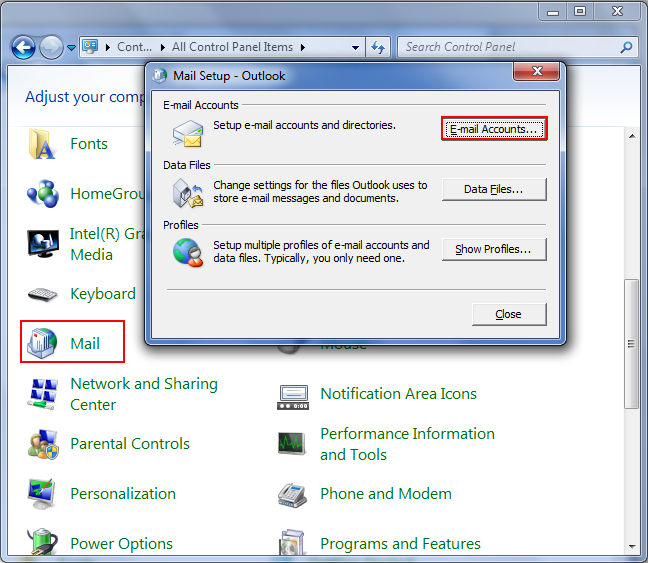
Go to “Control Panel” and click on “Mail“. You will see a mail setup wizard on the screen; click “Show Profiles”
In the “Mail” wizard, you can see the profiles configured with Outlook. There are two options available here:
- Prompt for a profile to be used: If this is enabled, then whenever you create an email and click on the send button, it will ask for the profile to be used.
- Always use this profile: If this option is enabled, the selected profile will be used by default for sending emails.